

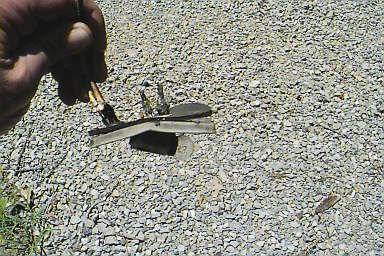
 | Here is the first clearance light I pulled off. I did it the wrong way. Tried to drill the screw heads - man are they hard. Got one drilled and thought I had the other one done. Stuck a stiff putty knife under it and tried to lift. One side just poped off the other side sent a very badly rusted molly right up through the roof taking a large chunk of fibebglass with it. Not acceptable. The problem here is the Molly. The fact that all of the lights were rusted very badly did not help. We were only able to get 3 screws of the 10 out. Most were either rusted so bad we could not get a screw driver on them or the molly spun. BTW out of the 10 only 2 mollies were fully compressed against the roof. |
| If you can get the screw out you still have the molly to deal with. We decided that the biggest contribution we could make here was to develop as many ways to get the mollies out as we could. We decided this seemed to be the biggest problem we had to face all day. If you get lucky and the screw comes out life is good. All you have to do is grab the lower portion of the molly and pull down. The 3 legs straighten out and you can push it out the top The legs are made of a fairly soft Alum. Only three came out this easy. | 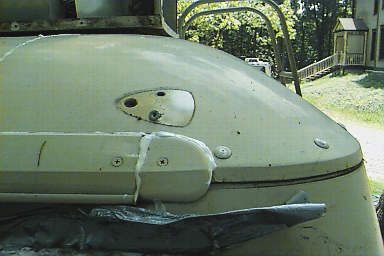 |
 | Here is the inside view of the mollys. Notice the black. This is a glob
of a tarlike substance that was put up here to keep the leaks to the
interior down. It does that. With the foam over it water will not get
to the interior - it just traps it around the molly.
OK, known ways to get mollys out without blowing a big hole in roof:
|
| The mollys are out. We could have just put in some Bondo. I dont like that as I have seen too much Bondo pop out. So we went inside peeled back the foam and fiberglassed the inside of the holes. Be sure the windows are open and a fan is blowing. The fumes get bad fast. Did not want to put fiberglass on outside because there is no way you could blend it. Inside it provides a brace for the Bondo and no problem for exterior finish. | 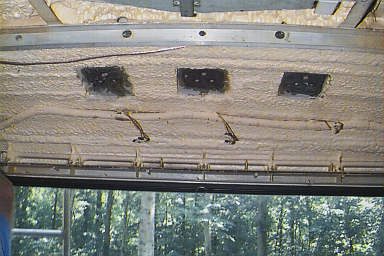 |
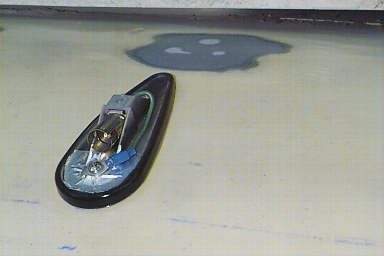 | Here is the light in place. You can see where we Bondo'd the old location. The lights were moved down to make room for the planned addition of a low-profile air conditioner later. Please note the ground wire under
the front screw. These lights come with just one wire - hot side.
The ground is provided by the screw to the body. Well we are out
here on the fiberglass so we need a ground. Just put a ring connector
down before you put in the screw and then connect it to the other
terminal. BTW you can buy this light with the ground wire built in
but you will pay 3 times as much for it. Yes that is shrink tubing
over the connection. Before you put the wire in
a crimp-on connector, dip it in dielectric grease. The connection will
last a lot longer. This is the stuff you use to keep aluminum wiring from
becoming a problem. The basic light is available at Walmart - Peterson Manufacturing No. V118A but Wallmart only handles the amber lens version - cost $4.18. NAPA sells the one Manfactured by Signal- Stat Lighting - exactly the same light for $9.73. If your NAPA store wants $9.73 for the light, buy the amber light at Wallmart and order the red lens from NAPA. |
| Now straight on the lights look good but wait for the next shot. I must admit that from the first time I ever saw the old girls I hated the lights on top. The always looked like they were just thrown on at the last moment. I was at a show where the first ones were displayed. I thought, "well they will change that" - they never did. | 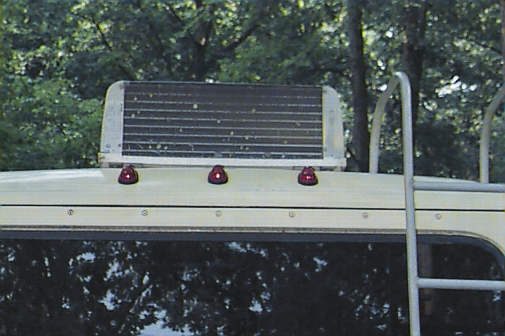 |
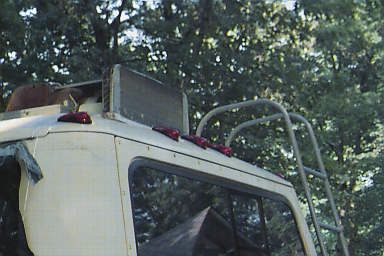 | Now this tells the story for me. It looks like the lights were made just for my lady. I dont care what anybody else thinks, I like this. |
member of |
||||
 |
 |
Analysis by |
||